
Behind the Scenes: How the FastMelts Explainer Animation Was Made
We’re excited to take you behind the scenes and share how we brought this project to life!
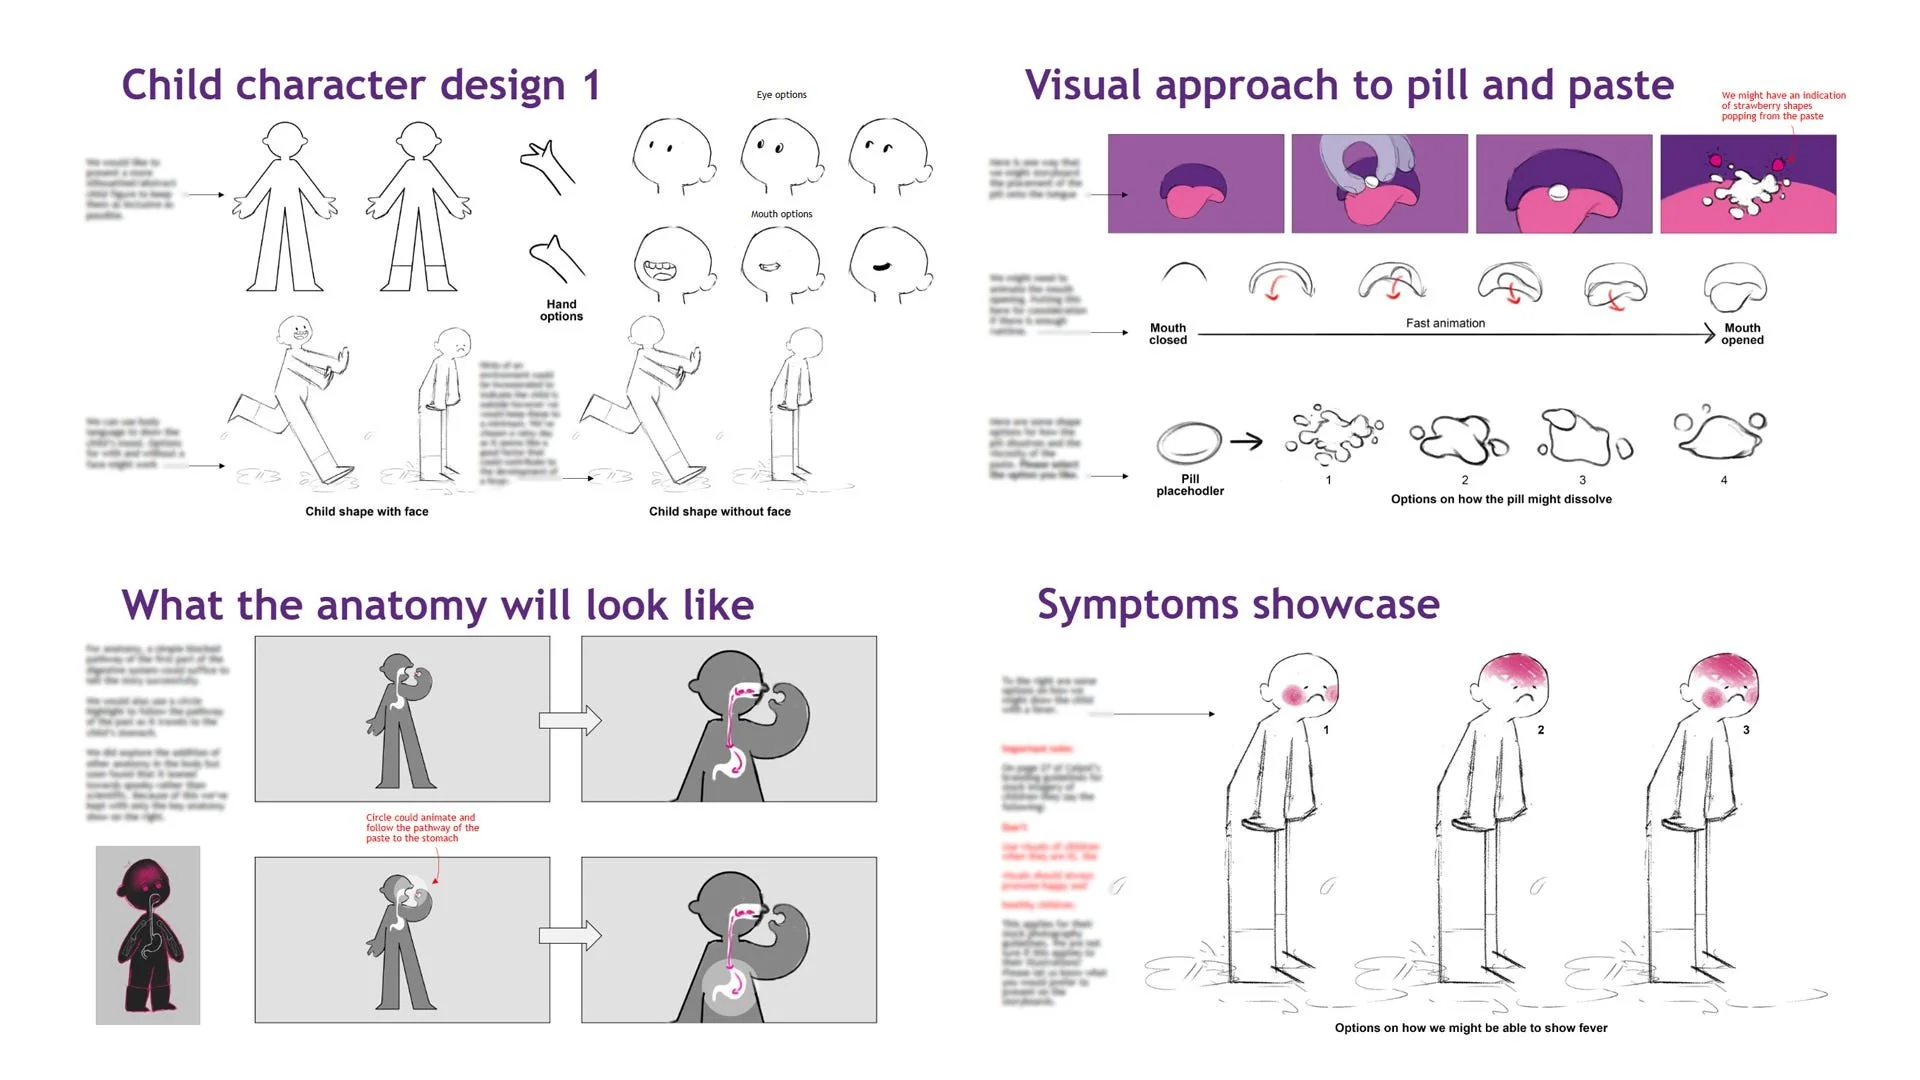
🎨 Establishing the Look and Feel
Our first step was to dive into mood boards and character sheets to establish the visual direction. This phase gave us space to explore brand colours and problem-solve more complex elements, such as depicting anatomy inside a cartoonish figure while maintaining scientific accuracy.
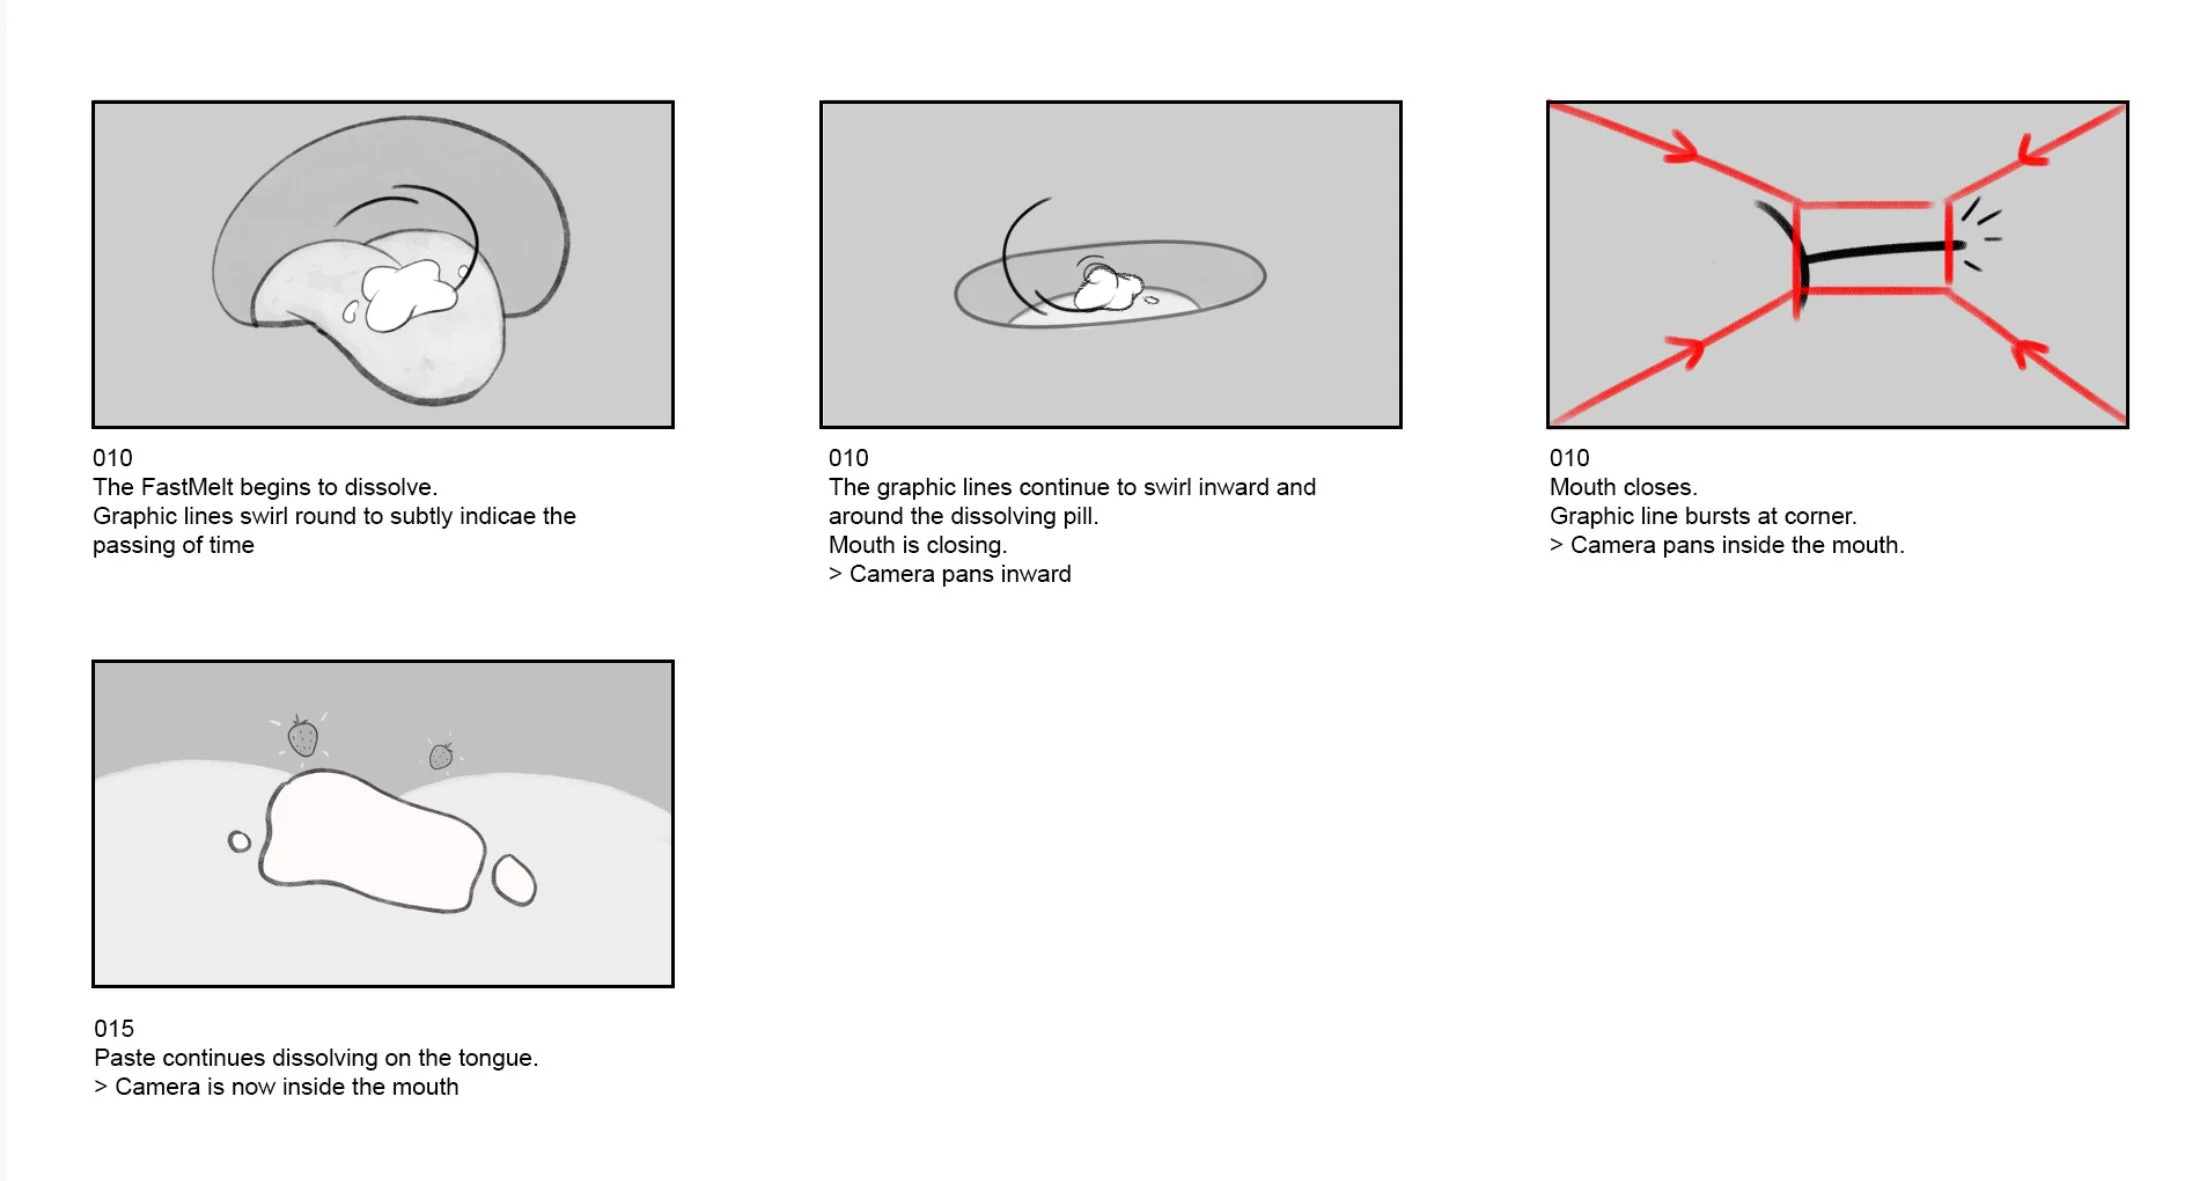
✏️ Storyboarding for Pacing and Transitions
Once the visual style was locked in, we moved to black-and-white storyboards to map out the pacing and scene transitions. This step allowed us to fine-tune how information was presented and ensure smooth on-screen text integration.
🎨 Adding Brand Colors for Client Review
With the initial storyboard approved, we developed a full-colour version to incorporate all brand elements and provide the client with a clear preview. This gave them an opportunity to review and suggest any refinements before we moved into the animation phase.

🎬 Bringing the Animation to Life
By the time we reached animation production, the streamlined approval process meant that all character designs and colors were signed off, allowing us to focus on fun and engaging character animations. With the foundation in place, we could ensure the final video was both visually captivating and scientifically accurate.
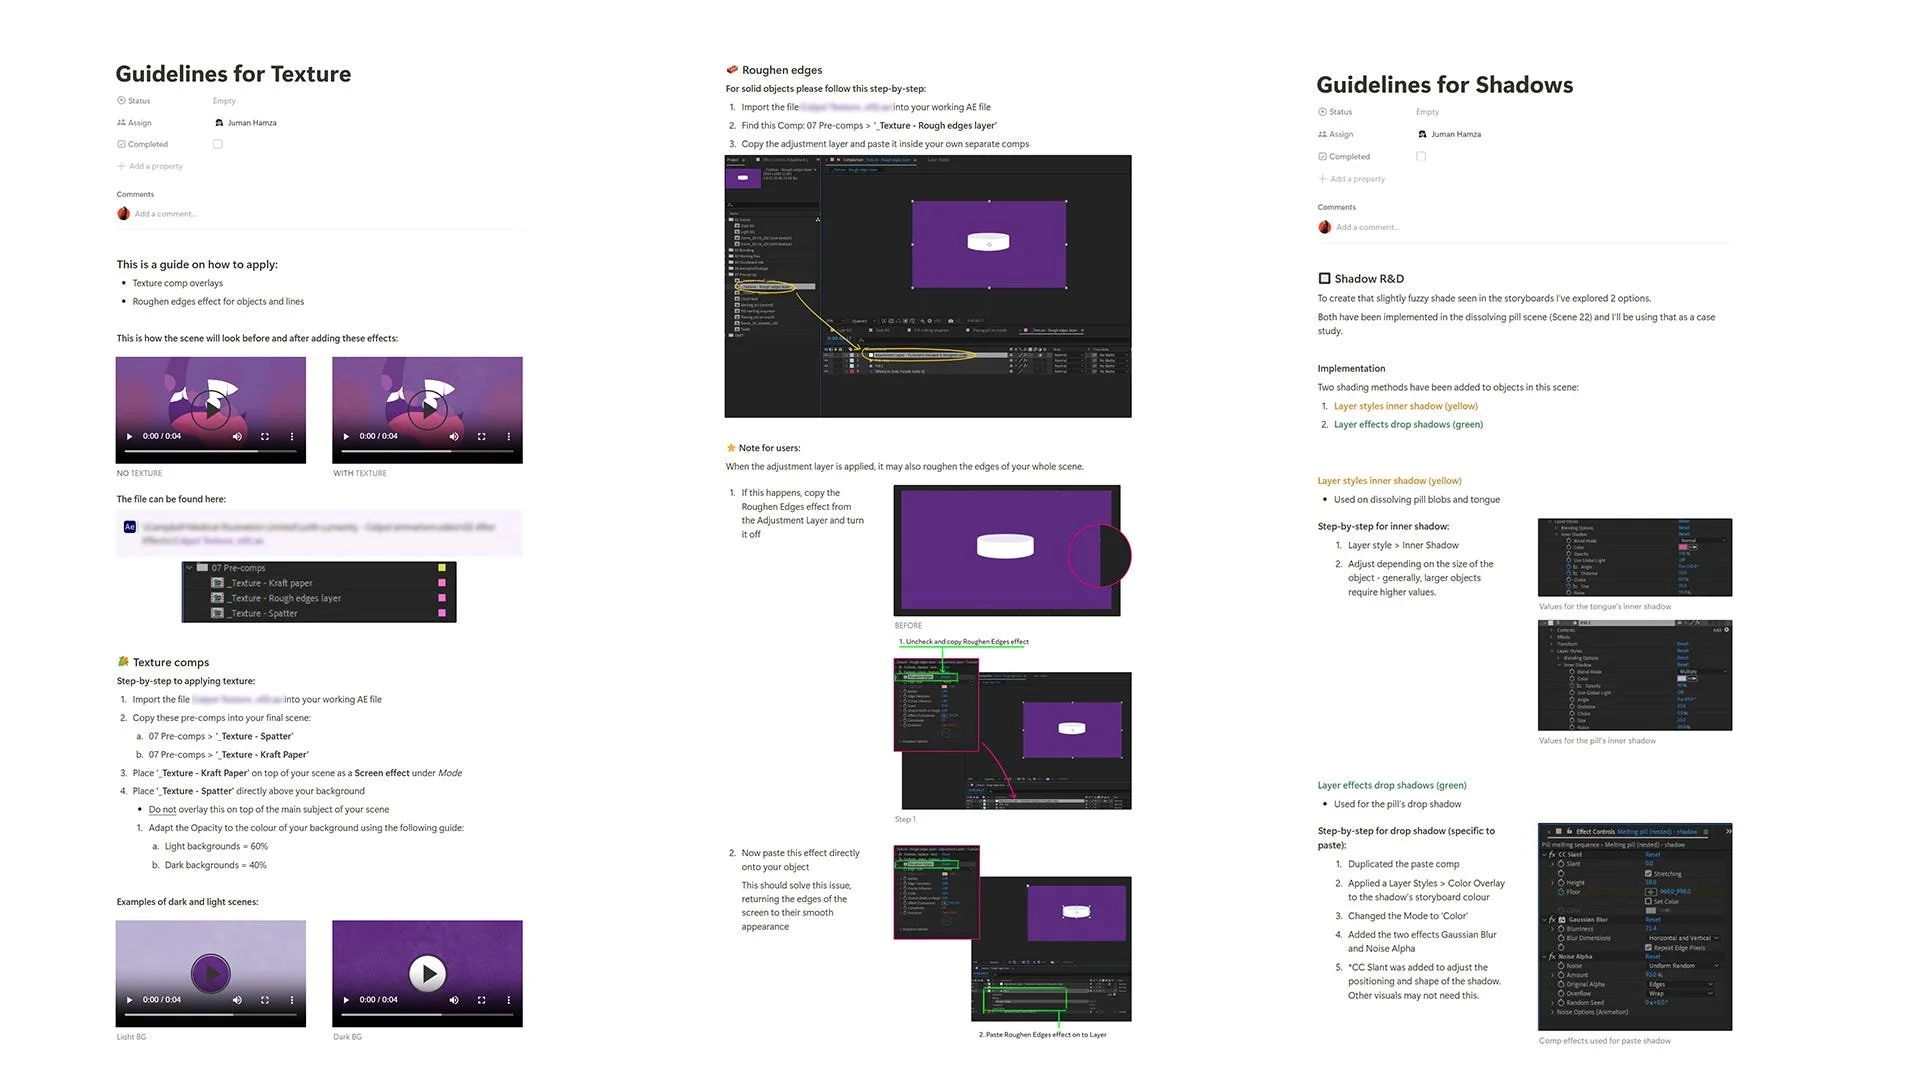
📚 Establishing Internal Guidelines for Seamless Animation
As part of the animation production phase, our team developed internal guidelines and software settings to ensure that all animators worked seamlessly together. This approach helped maintain a unified look and feel across every shot, allowing us to preserve consistency in character movements, colours, and visual effects.
We hope you enjoyed this behind-the-scenes look into our process. Stay tuned for more insights on how we continue to blend creativity and science in our projects! 🚀