
Medical illustration tutorial: How to create cross sections in tubes

I once heard a medical illustrator say that if you can master drawing believable tubes and spheres, then you can draw anything in your medical illustrations. After many years of creating 2D digital medical illustrations, I have to agree with them. Being able to master drawing primitive shapes can save you a lot of heart ache when it comes to highly complex medical illustrations. In this tutorial I wanted to share how you can draw a cross section in a bending tube.

Step 1
When creating cross sections, it’s always useful to start out with a simple primitive shape.
In this example, we’re going to add a cross section to this tube.

Step 2
By keeping your shapes simple, you can easily mark out the contours of the surface. Visualising the contours will help you create and build a believable form.
It’s a useful exercise to practice in primitive shape design.

Step 3
Let’s add in our cross sectional planes. I always find it more interesting to off-centre the planes as this creates a more dynamic cut and allows you to implement some cool perspective.
In terms of an information design standpoint, having one side more exposed means that you can draw in more information on that surface to help explain any pathology or structural details that you need to depict in your medical illustration.

Step 4
Now you can add in depth to your cross sectional cuts, using the theory and skills you’ve learning in studying perspective.
Be sure to think about the planes that are hidden. I find it useful to block those in or to visualise them in your mind as you draw.

Step 5
Once you have a solid base shape and cuts with believable perspective implemented, you can then begin building the illustration and add in details to make your primitive shape look organic and more like soft tissue.
Because you have built a solid foundation in your base shape, when it comes to adding in details, your medical illustration will look believable.
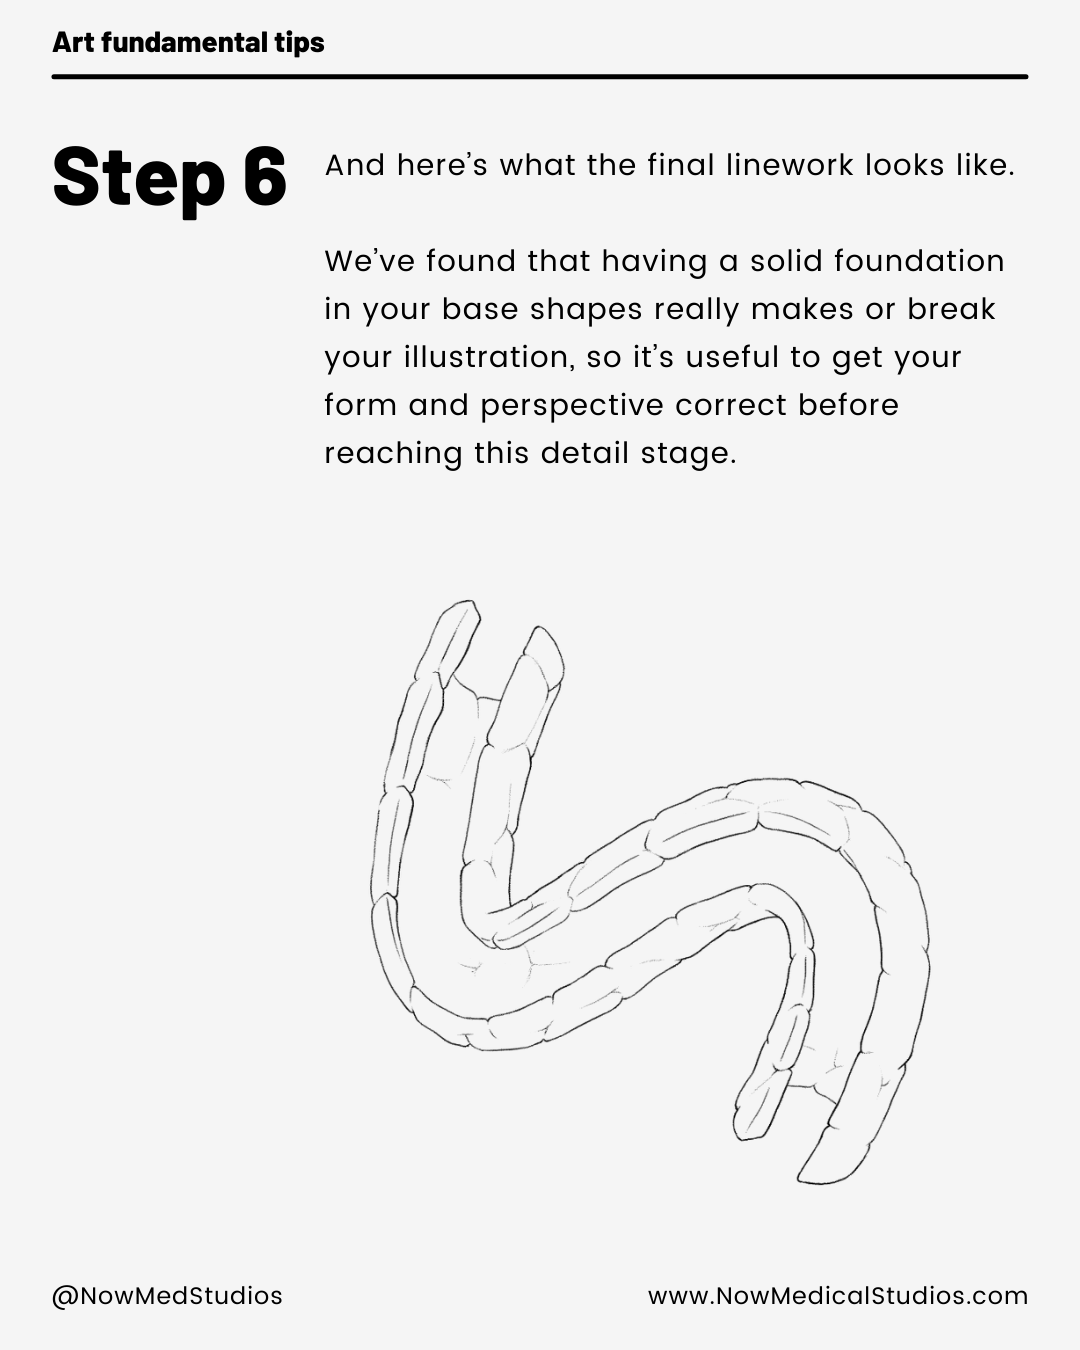
Step 6
And here’s what the final line work looks like.
Again, we’ve found that having a solid foundation in your base shapes really makes or break your illustration, so it’s useful to get your form and perspective correct before reaching this detail stage.

Thank you!
Thanks so much for checking out this mini tutorial. Let me know what you think in the comments below or if you have any questions.