
MEDICAL ILLUSTRATIONS OF TREATMENTS FOR A DISHED-IN PROFILE
CLIENT
UZ Leuven
CHALLENGE
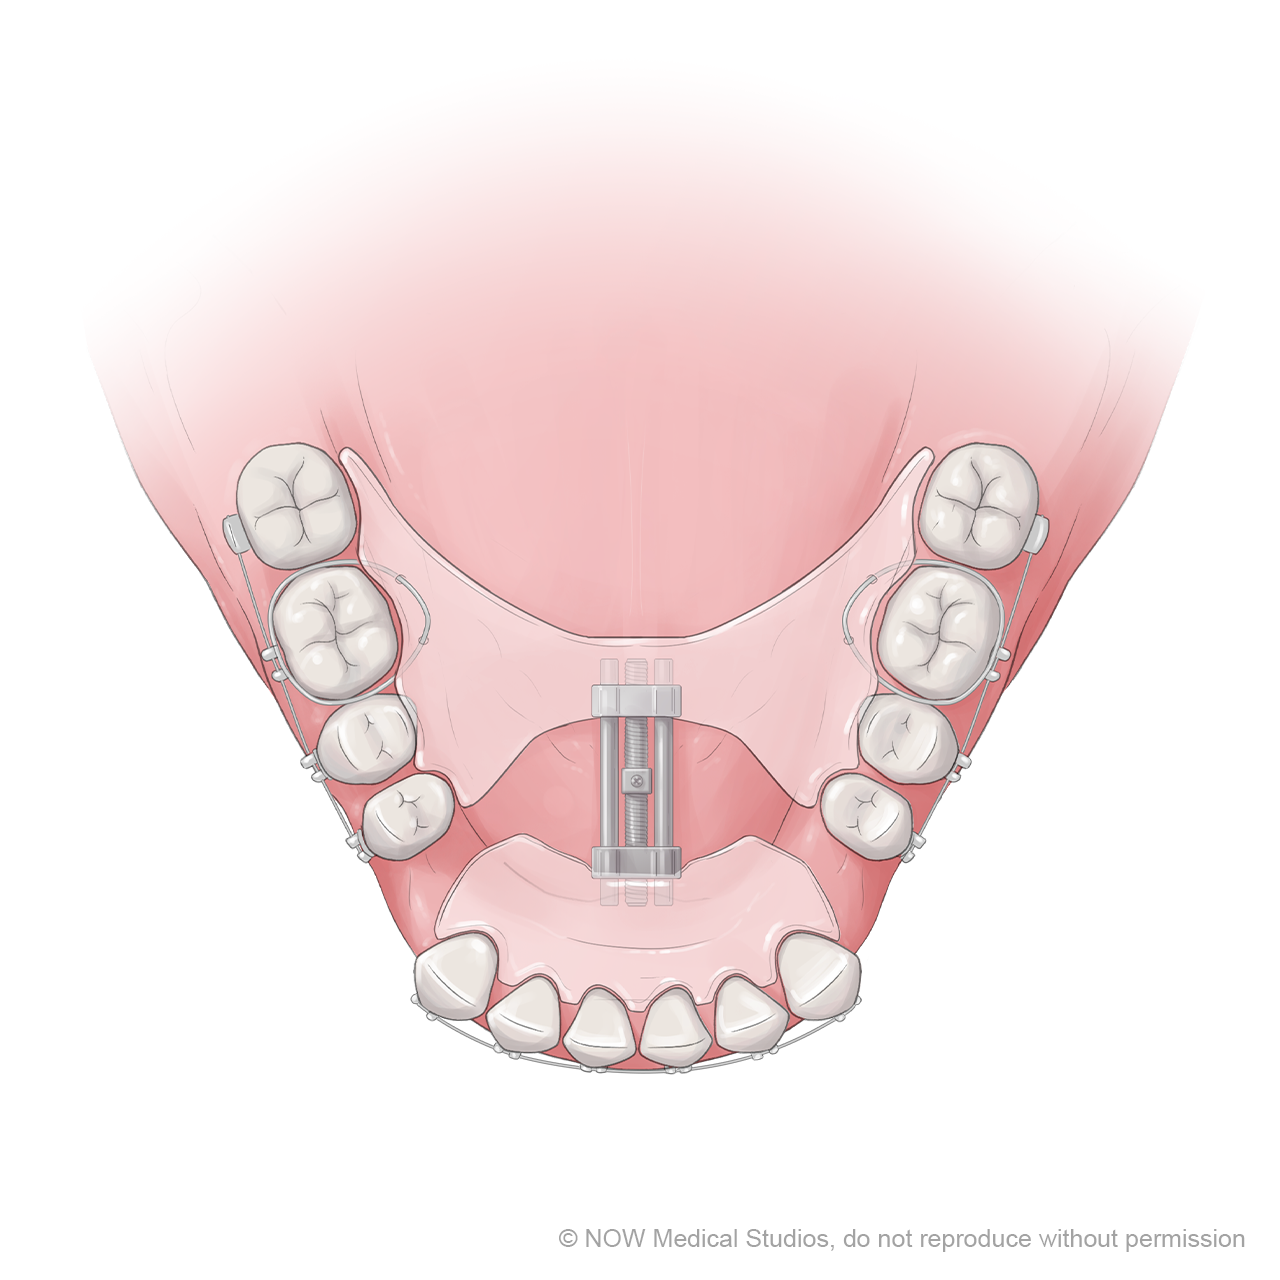
The team at UZ Leuven approached us for a set of unique illustrations to clearly outline the various treatment methods for a dished-in profile, to be used in their oral maxillofacial teaching and research materials.
SOLUTION
The most important aspect of this project was to show the really key information in each image to allow for easy comparison and understanding of the different procedures. We took a deep-dive into oral maxillofacial anatomy and sourced device manufacturers’ IFUs in order to hone in the key points of each image, using clean and bright colours to help direct the viewer’s attention for quick understanding.
ARTISTS
Susie Brighouse
Emily Holden
Angela Yeung


VISUAL DEVELOPMENT
We’ve always found it useful to see the process of how other people create things. Here are some behind the scenes snippets and work in progress pieces that might be of interest to you.
If you want to learn more about our techniques for creating our content, check out our education channel Learn Medical Art.


Step 1
We start with an initial rough sketch to figure out the key anatomy and components of the distraction device.

Step 2
The rough sketch is then tightened up ready for the client to review. At this stage we decided to show less soft tissue than in the previous step to help give more breathing space for the key information.

Step 3
We then go on to tighten the linework and lay in some base colour.
Step 4
We can now begin the rendering process and add colour to the soft tissue, teeth and distraction device.